Create an oauth2 client in ory
This guide shows you how to register an OAuth2 client in your Ory project.
- Ory Console
- Ory CLI
- Log in to your Ory Console
- Select your workspace and project from the dropdown menus at the top
- Click on OAuth2 in the main navigation menu
- In the OAuth2 page, select on the OAuth2 Clients tab
- Click the Create OAuth2 Client button
- In the client type selection screen, select Custom
- This option gives you full control over all OAuth2 client settings
https://console.ory.sh/projects/<project-id>/oauth/create
-
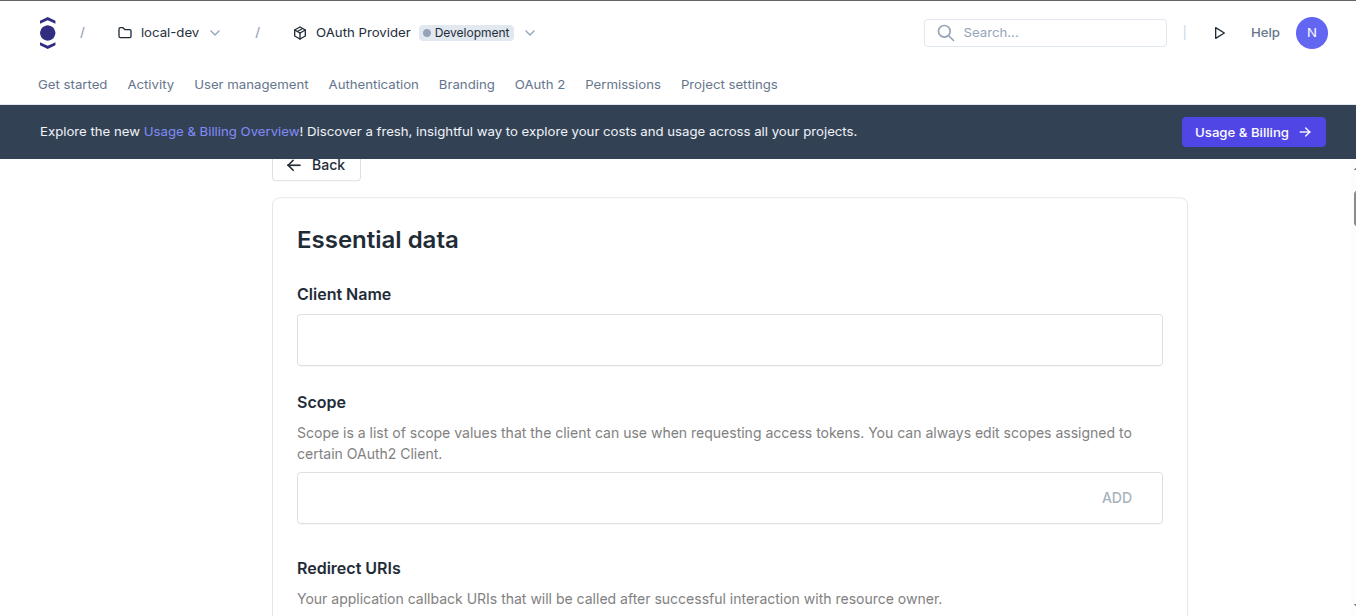
Fill in the client details:
- Client Name: A name for your client
- Redirect URIs: The URLs to which Ory will redirect users after authentication (e.g., http://localhost:3000/callback)
- Scopes: The permissions your client will request (recommended: openid, email, and profile)
- Grant Types: Select
authorization_codeandrefresh_token - Response Types: Select Authorization code (
code) - You can leave the rest of the settings as default for now.
-
Copy the Client ID and Client Secret generated for your client. You will need these values to configure your application.
note
Ensure you save before leaving the page. You can always come back to this page to view or edit your client settings.
- Create an Ory Network project if you don't have one yet:
ory create project --name "Ory Docs OAuth2 Integration Example"
note
Copy the Project ID and Project Slug from the output. You will need these values to configure your application.
- Create these environmental variables in your shell:
export ORY_PROJECT_ID=<your-project-id>
export ORY_PROJECT_SLUG=<your-project-slug>
- Create the OAuth2 client:
ory create oauth2-client --project "$ORY_PROJECT_ID" \
  --name "Ory Docs OAuth2 Integration Example Client" \
  --grant-type authorization_code,refresh_token,client_credentials \
  --response-type code \
  --scope openid --scope offline_access --scope email \
  --redirect-uri http://localhost:3000/callback
note
The command will output your Client ID and Client Secret. Make sure to save these values securely as they'll be needed in your application configuration.