Configure social sign-in with Ory Identities
This guide shows you how to configure Ory Identities as a social sign-in provider, allowing users to authenticate using another Ory project.
Understanding ory-to-ory authentication
When setting up Ory OAuth2 as a social provider, you'll work with two separate Ory projects: a provider project that serves as your identity source (similar to how Google works in "Login with Google"), and a consumer project where you add the "Sign in with Ory OAuth2" option for your users.
- Ory Console
- Ory CLI
1. Set up ory oauth2 as a social provider
- Go to your Ory project in the Ory Console
- Click on Authentication in the main navigation menu
- Select Social Sign-In (OIDC) from the sidebar
- Enable OpenID Connect by toggling the switch
- Click on Add new OpenID Connect provider
- Select Ory OAuth2 from the provider list
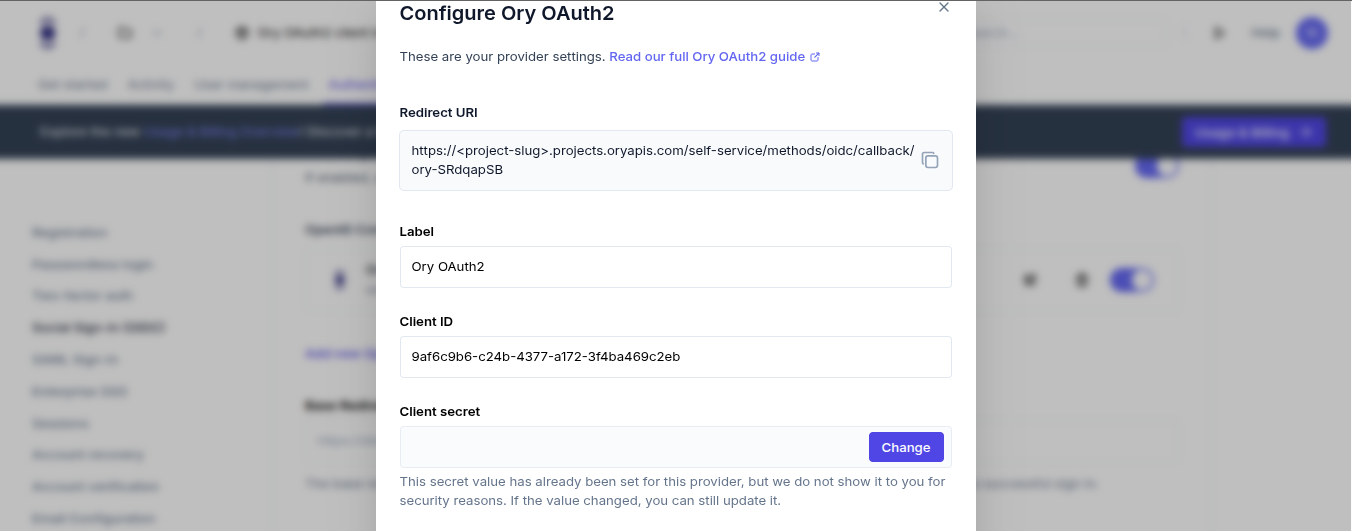
2. Configure the ory oauth2 provider
Fill in the provider details using the information from your provider project (OAuth2 client setup):
- Redirect URI: This is pre-filled and automatically includes a unique callback ID
- Label: You can keep "Ory OAuth2" or customize it
- Client ID: Enter the OAuth2 client ID from your provider project
- Client Secret: Enter the OAuth2 client secret from your provider project
- Issuer URL: Enter the base URL of your provider project
https://your-provider-project-slug.projects.oryapis.com
3. Configure redirect uri in provider project
To avoid redirect errors, you must add the consumer project's callback URL to your provider project:
- Go to your provider project in the Ory Console
- Navigate to OAuth2 → OAuth2 Clients
- Find and edit your OAuth2 client
- In the Redirect URIs section, add the exact callback URL shown in your consumer project's configuration:
https://your-consumer-project-slug.projects.oryapis.com/self-service/methods/oidc/callback/ory-XXXX - Save the changes
1. Create a provider project and oauth2 client (if needed)
If you haven't already created a provider project and OAuth2 client:
# Create a provider project
ory create project --name "OAuth2 Provider - Example Corp"

# Save the project ID for future use
export PROVIDER_PROJECT_ID=your-provider-project-id  # replace with your project ID

# Create an OAuth2 client in the provider project
ory create oauth2-client --project "$PROVIDER_PROJECT_ID" \
  --name "OAuth2 Client for Social Sign-in" \
  --grant-type authorization_code,refresh_token \
  --response-type code \
  --scope openid,offline_access,email \
  --redirect-uri https://your-consumer-project-slug.projects.oryapis.com/self-service/methods/oidc/callback/your-provider-id
Save the Client ID and Client Secret from the output. You'll need these for configuring the consumer project.
2. Download the identity configuration from your consumer project
# List all available workspaces
ory list workspaces

# List all projects in the workspace
ory list projects --workspace <workspace-id>

# Get and save the identity configuration
ory get identity-config --project <consumer-project-id> --format yaml > identity-config.yaml
3. Create a jsonnet mapping for identity claims
Create a file named claims-mapper.jsonnet with the following content:
local claims = {
  email_verified: false,
} + std.extVar('claims');

{
  identity: {
    traits: {
      // Only map verified email addresses to prevent enumeration attacks
      [if 'email' in claims && claims.email_verified then 'email' else null]: claims.email,
    },
  },
}
4. Convert the jsonnet mapping to base64
# On Linux/macOS
BASE64_MAPPER=$(cat claims-mapper.jsonnet | base64)

# On Windows PowerShell
$BASE64_MAPPER = [Convert]::ToBase64String([Text.Encoding]::UTF8.GetBytes((Get-Content -Raw claims-mapper.jsonnet)))
5. Add the social sign-in provider to your configuration
Edit your identity-config.yaml file to include the OIDC provider configuration:
selfservice:
  methods:
    oidc:
      config:
        providers:
          - id: ory-oauth2 # A unique ID for this provider (don't change once set)
            provider: generic
            client_id: "your-client-id" # From step 1
            client_secret: "your-client-secret" # From step 1
            issuer_url: "https://your-provider-project-slug.projects.oryapis.com" # Provider project URL
            mapper_url: "base64://YOUR_BASE64_ENCODED_JSONNET" # Replace with your base64 content
            scope:
              - email
              - offline_access
              - openid
      enabled: true
Replace YOUR_BASE64_ENCODED_JSONNET with the base64 string from step 4.
6. Update your project configuration
ory update identity-config --project <consumer-project-id> --file identity-config.yaml
7. Configure redirect uri in provider project
Make sure the OAuth2 client in your provider project includes the correct redirect URI for your consumer project:
# Get the OAuth2 client ID
export CLIENT_ID=your-oauth2-client-id  # Replace with your client ID

# Get the current OAuth2 client configuration
ory get oauth2-client $CLIENT_ID --project $PROVIDER_PROJECT_ID > oauth2-client.json

# Update the client configuration to add the redirect URI
# Edit oauth2-client.json to add the correct redirect URI to the "redirect_uris" array
# Then update the client:
ory update oauth2-client $CLIENT_ID --project $PROVIDER_PROJECT_ID --file oauth2-client.json
What users will see
Once configured, users will see an "Ory OAuth2" option on your login screen:
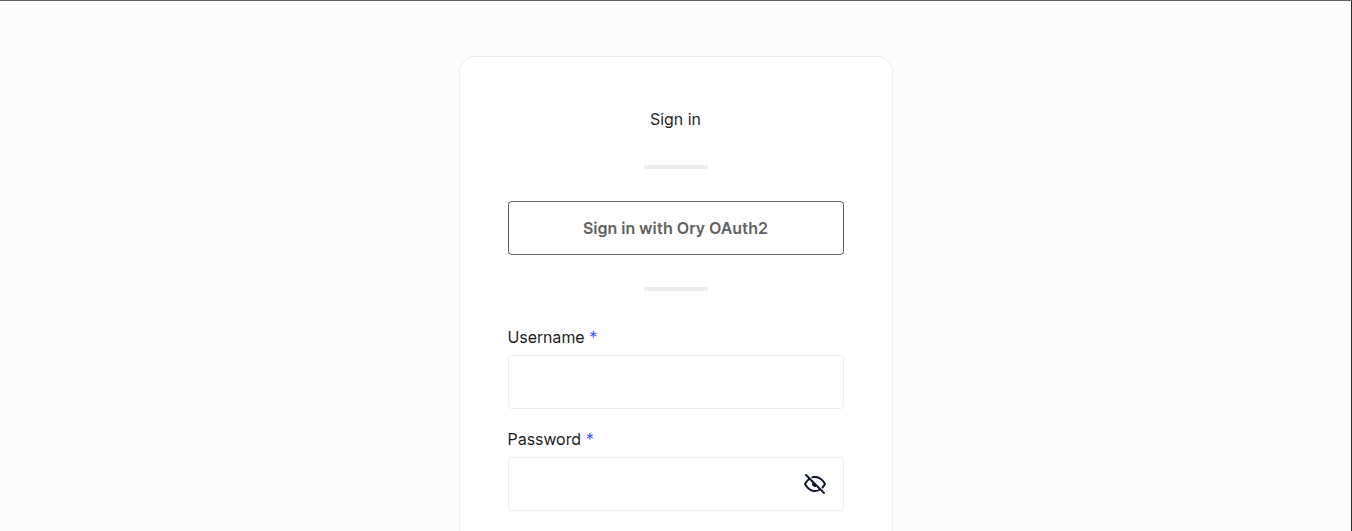
When users click this button, they'll be redirected to authenticate with your provider Ory project. After successful authentication, they'll be redirected back to your application with a valid session.